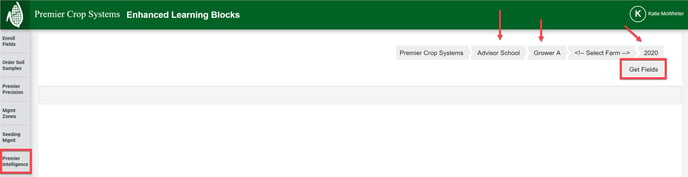
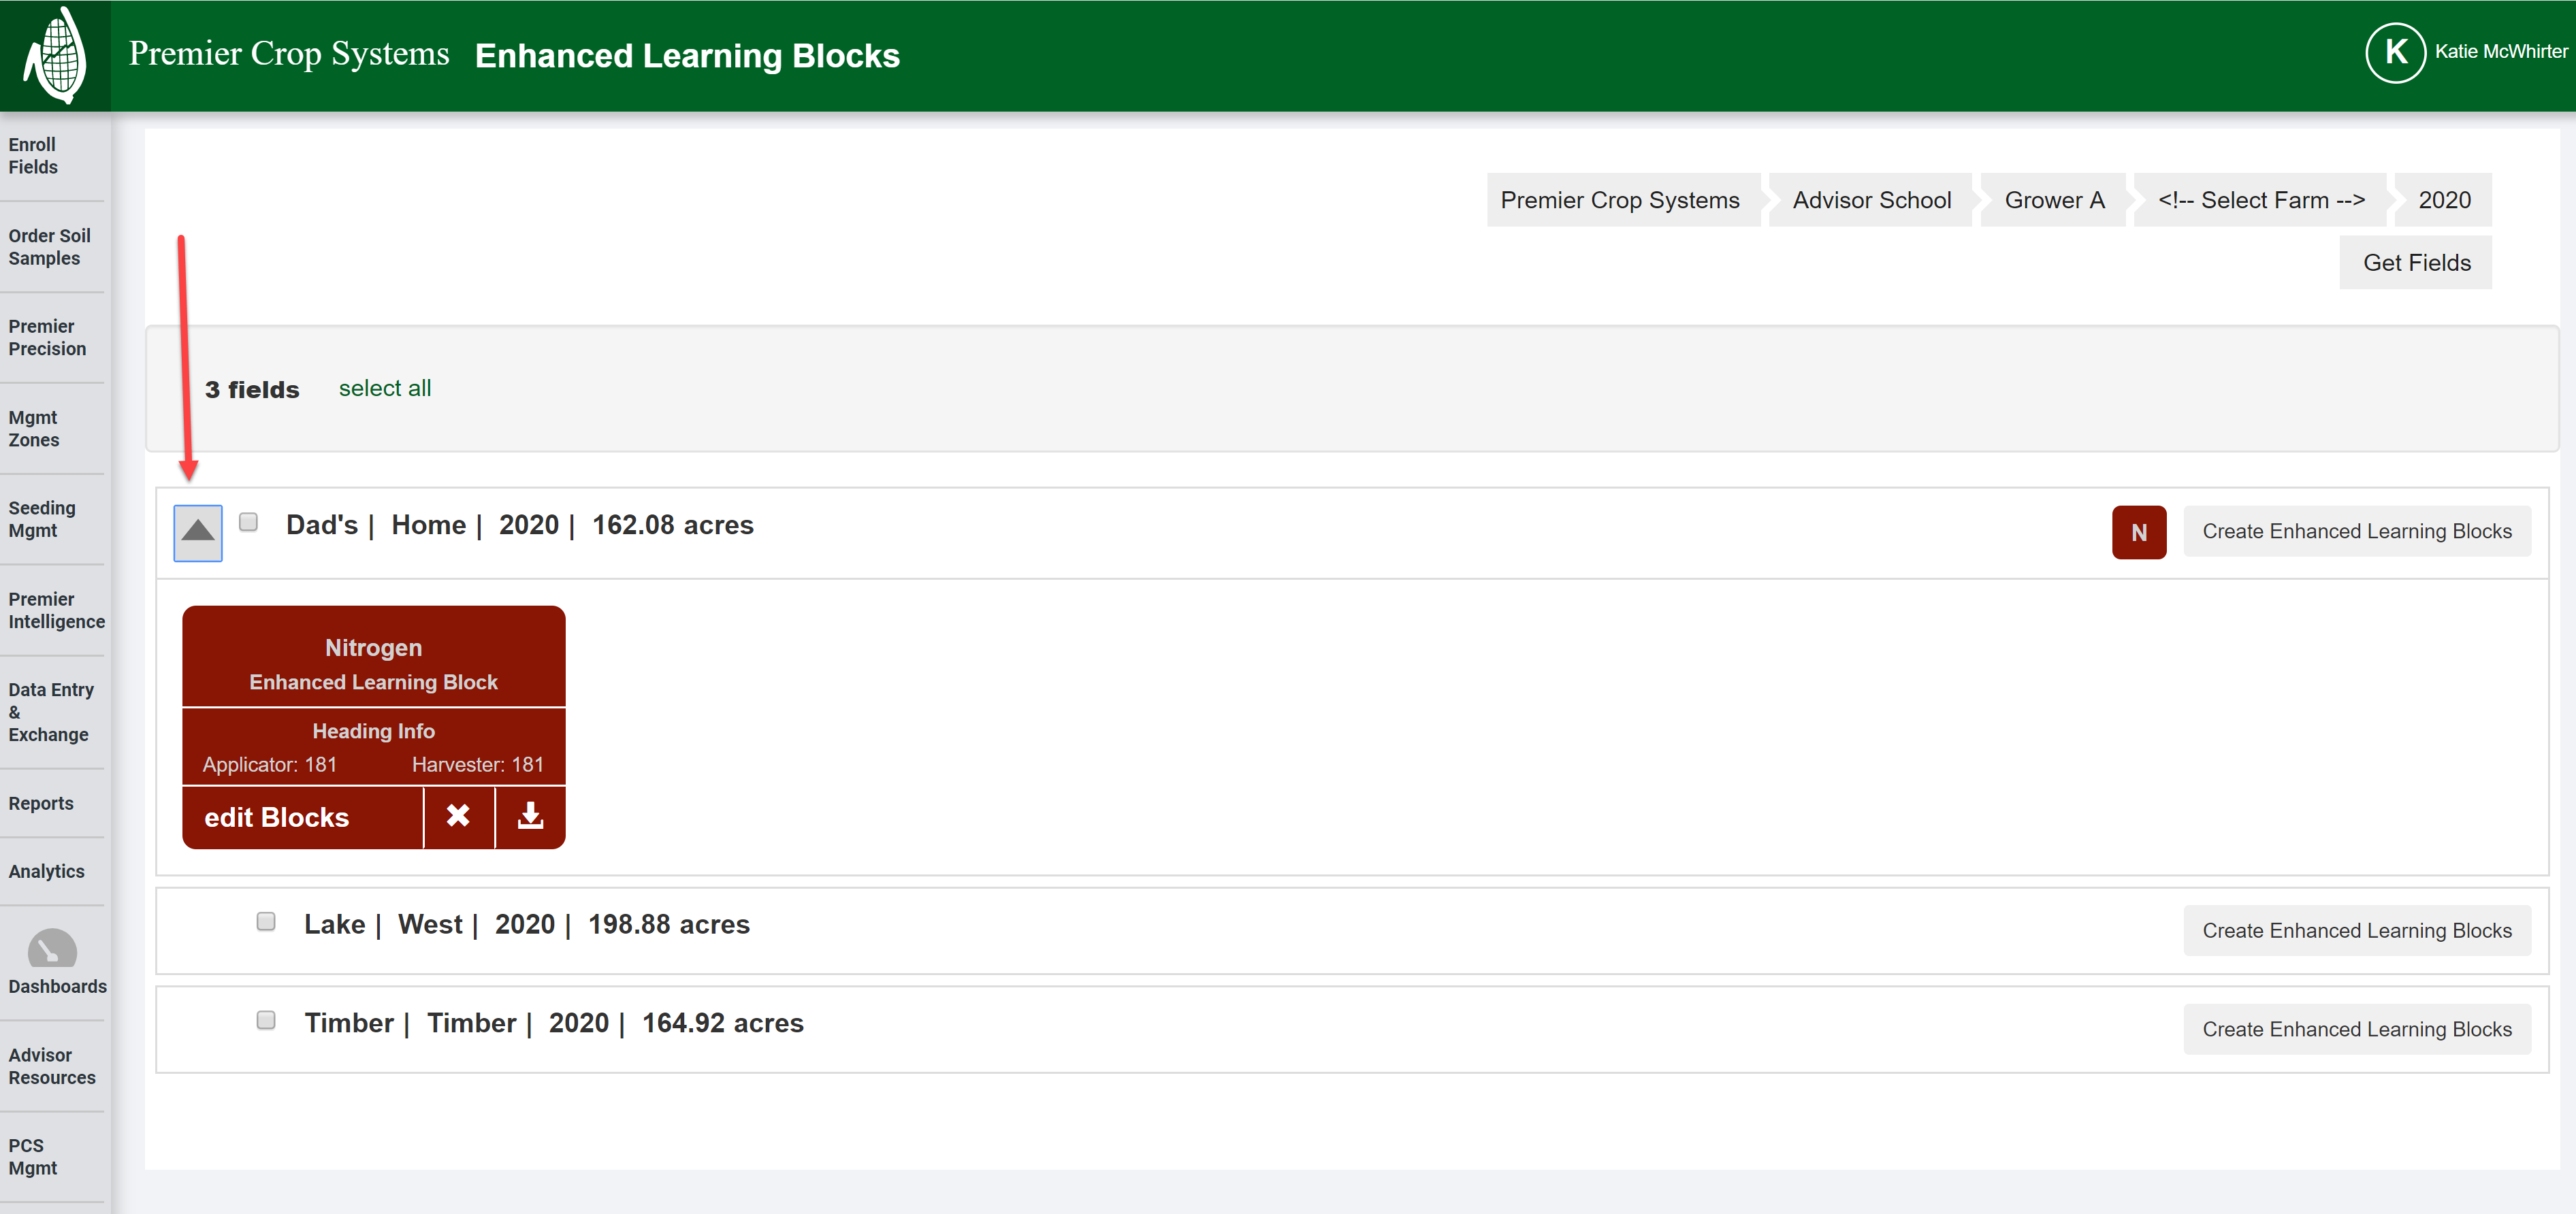
- Once logged into your PCS account, click on the "Premier Intelligence" tab and then navigate to the desired Branch, Grower, and Year (filter down by Farm level, if you wish) and click the "Get Fields" button.
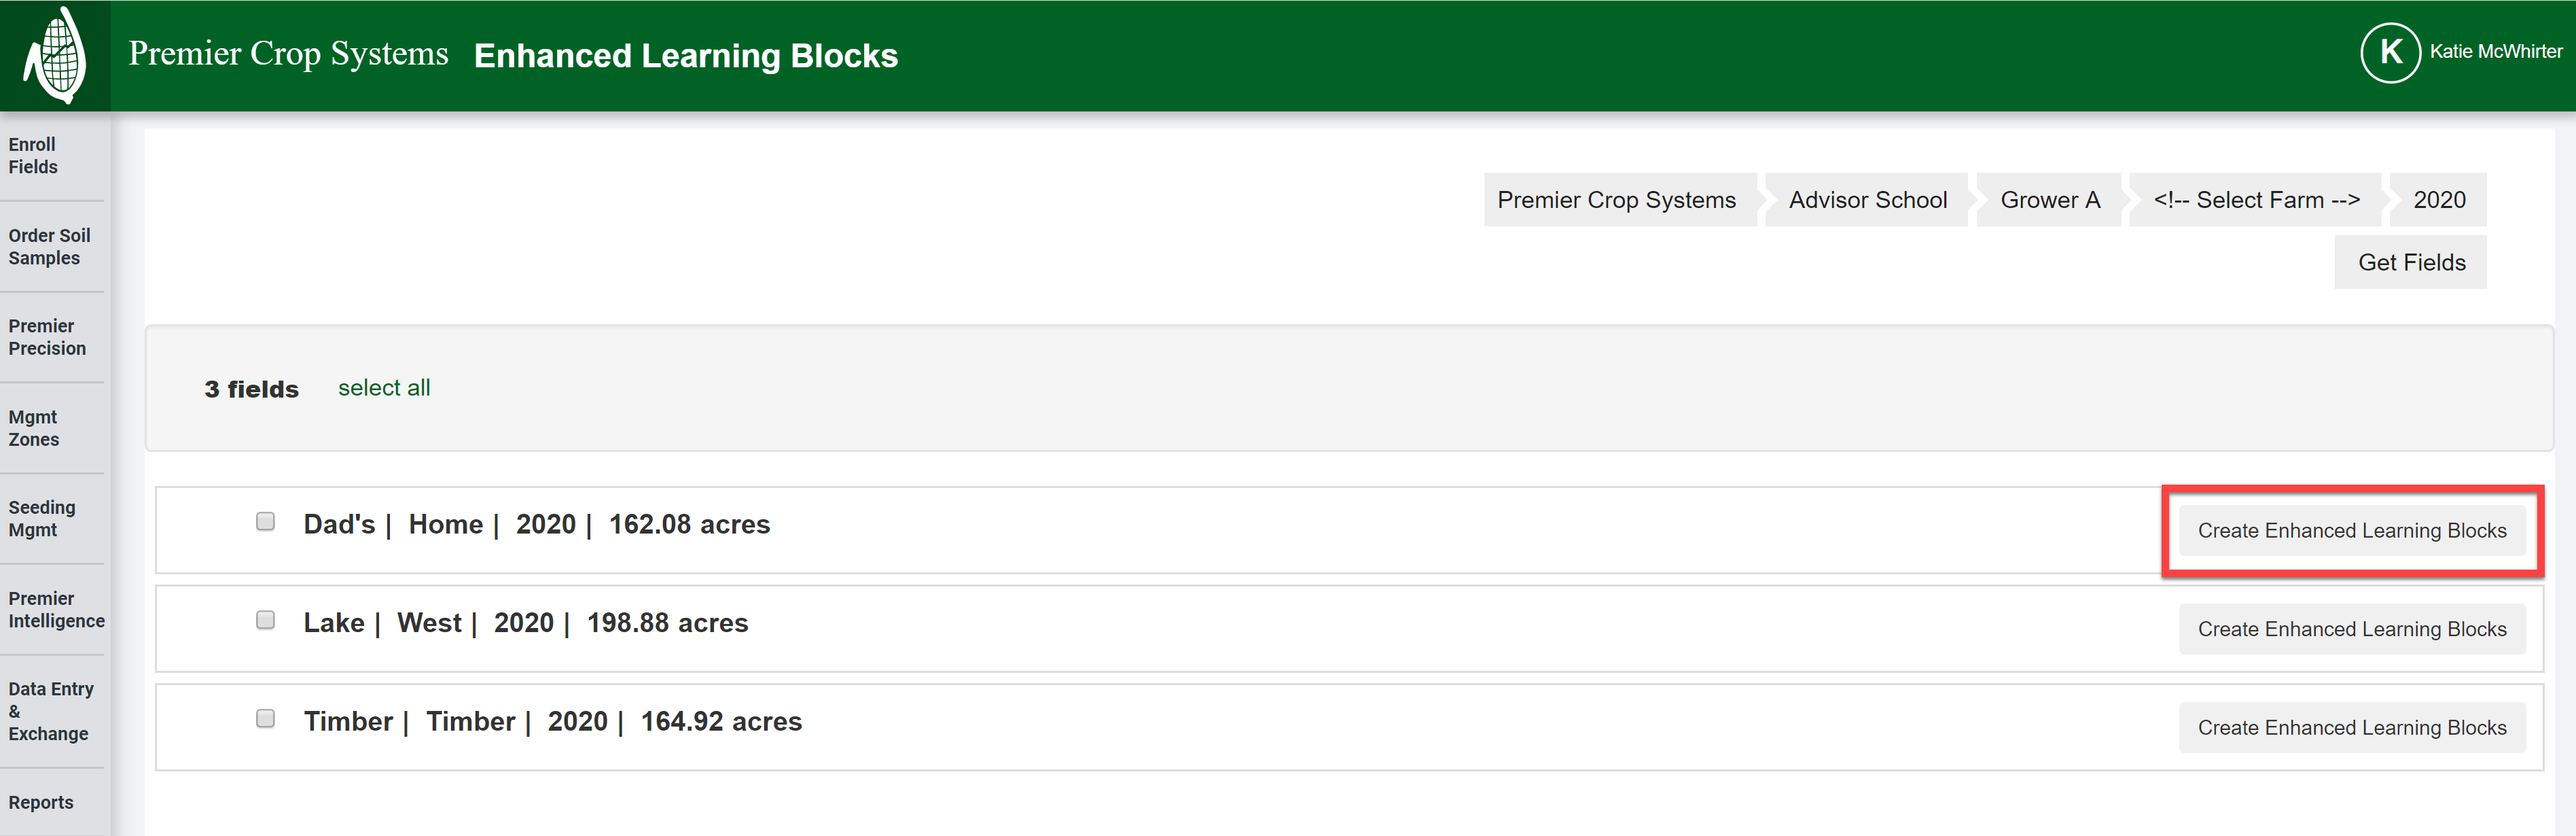
- Select the field that you wish to create the ELB for and click the "Create Enhanced Learning Blocks" button.
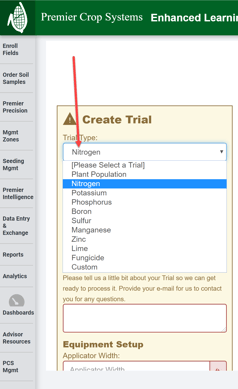
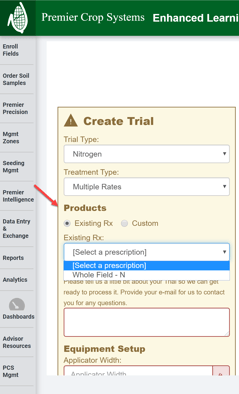
- Select the ELB Trial Type:
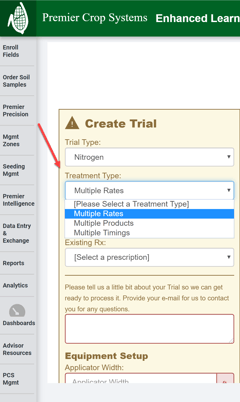
- Select the Treatment Type.
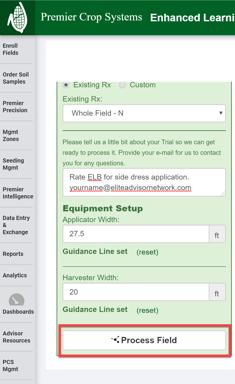
- You can use the Product from an existing Prescription or enter a custom one.
- Enter in the Applicator Width.
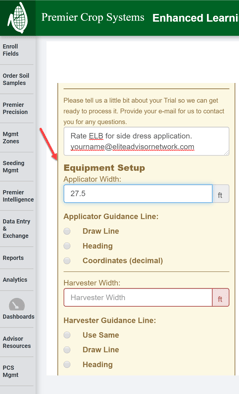
- Now you will need to set the Applicator's Guidance Line. You can do this by Draw Line, entering in the Heading, or entering in the Coordinates. If you need assistance with how to use any of these tools, there are Premier Processes to address each.
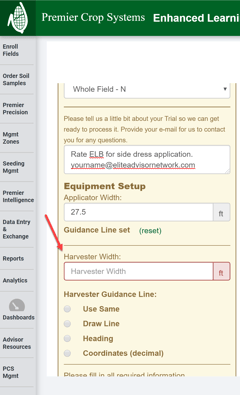
- Enter the Harvester's Width and the Guidance Line that will be used for harvesting the selected field.
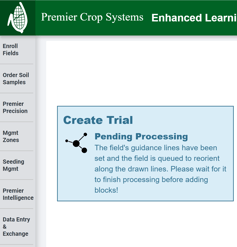
- Once all the needed data is entered, you will see this part of the web turn green and you will need to click on the "Process Field" button.
- You will see a Create Trial box pop up as it is processing.
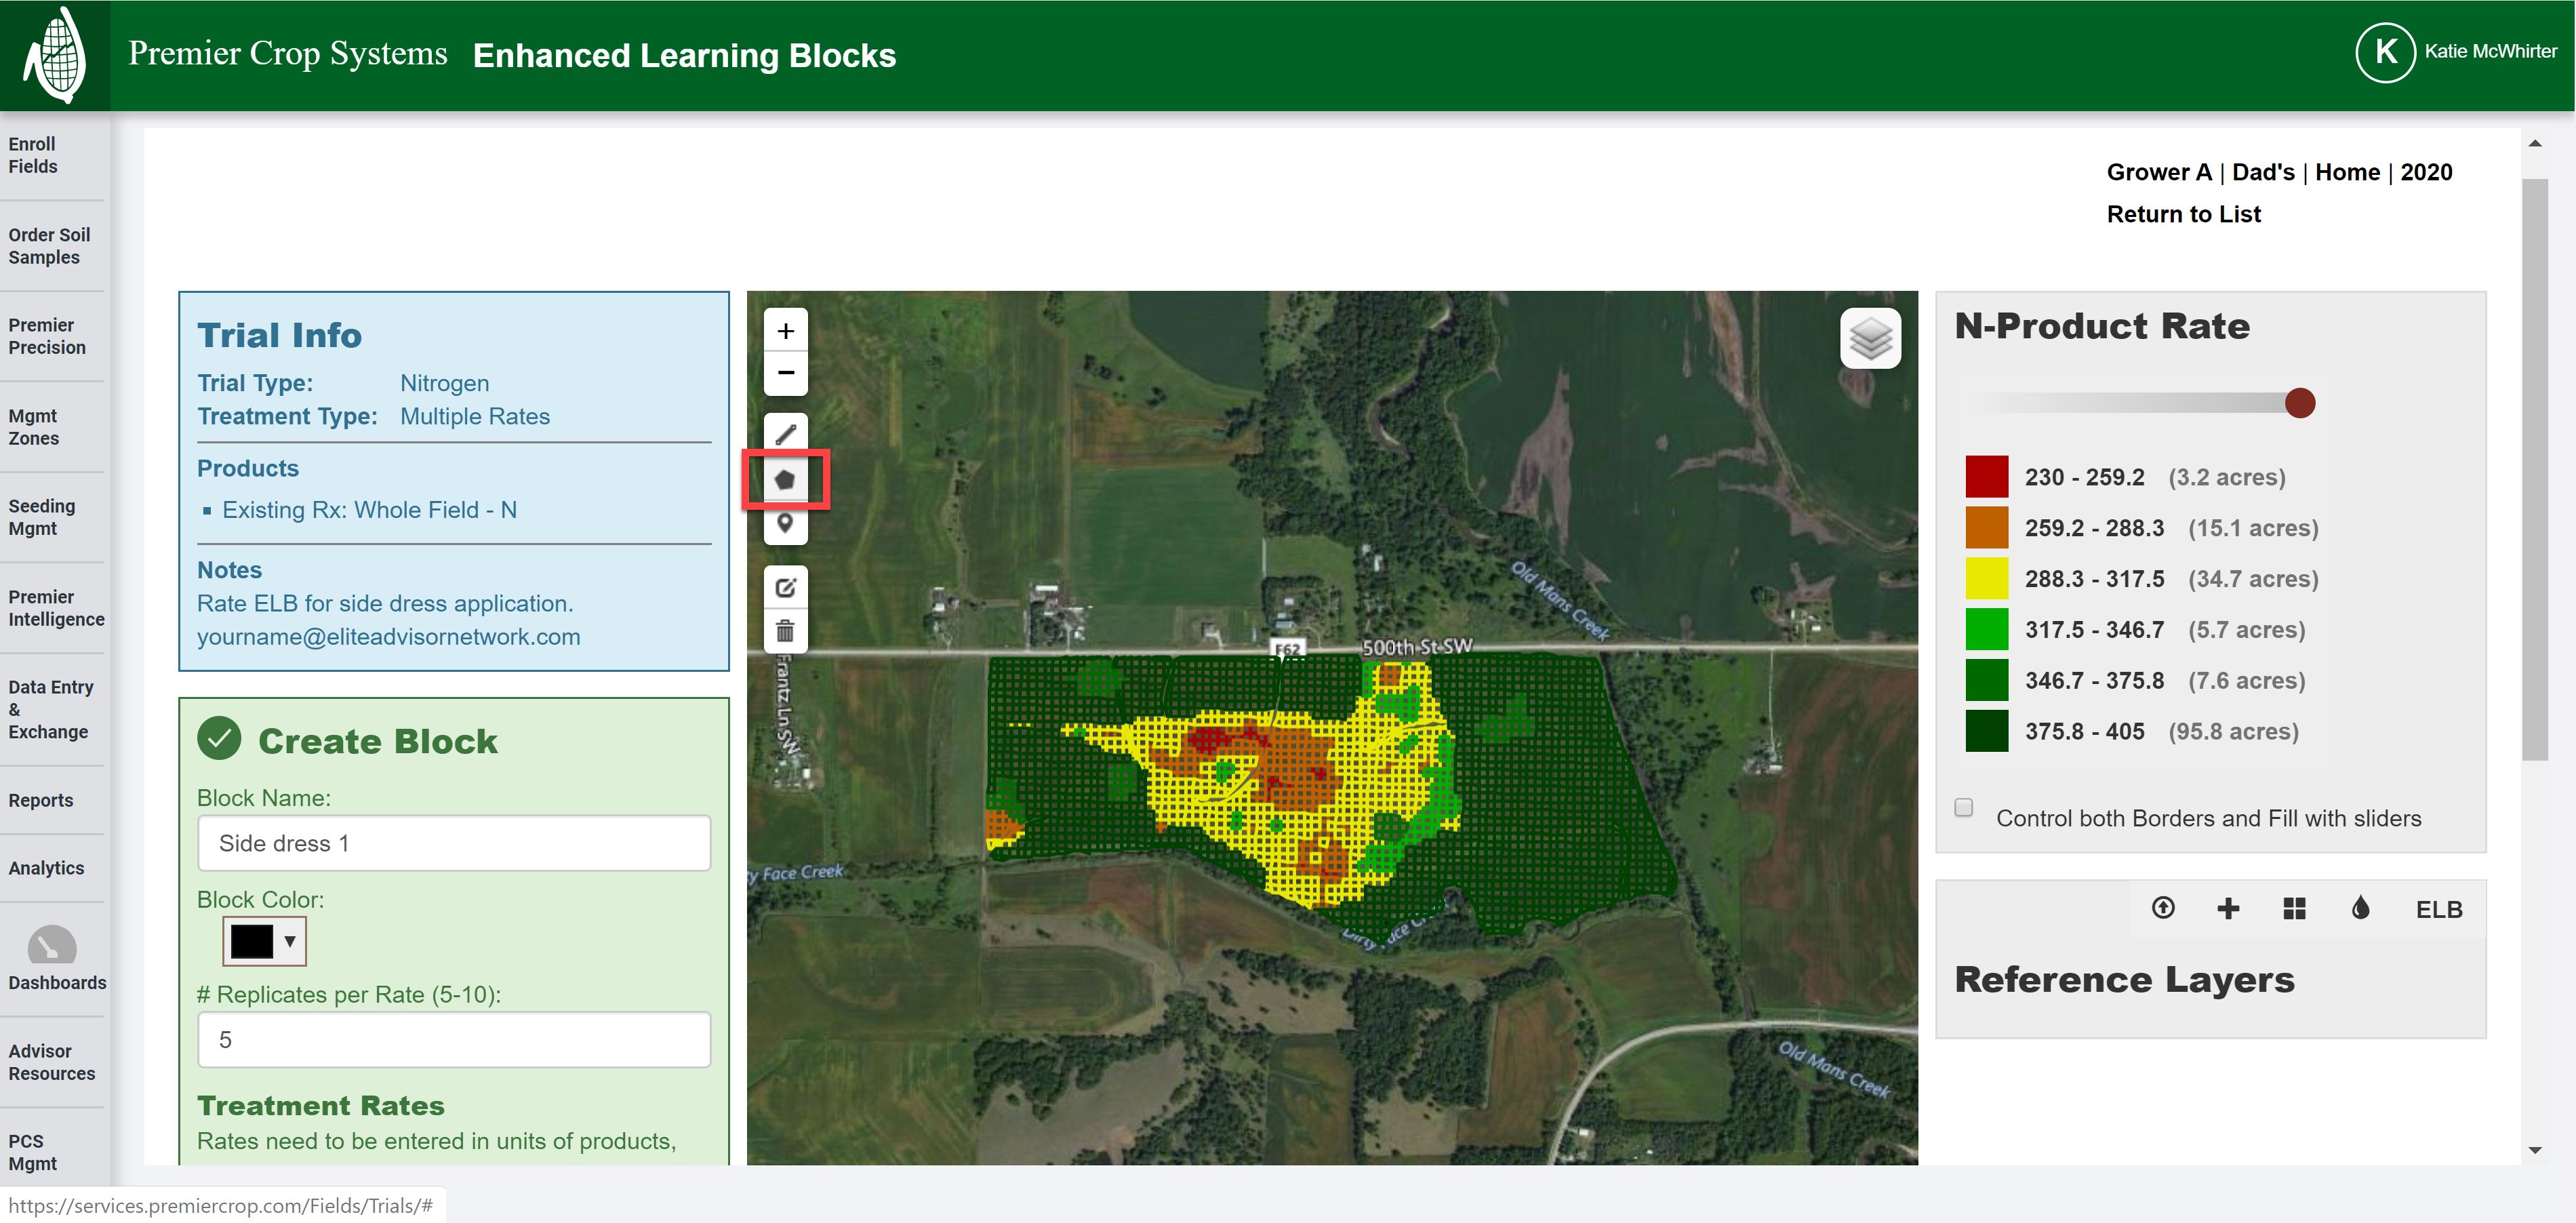
- Once it has processed, you will now need to create the area for the ELB(s) to be placed.
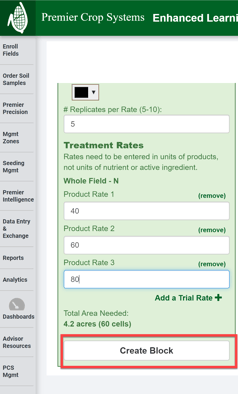
- Give your ELB a name and select the number of replicates that you wish to have. The default color of you blocks is black and you can change this if you desire.
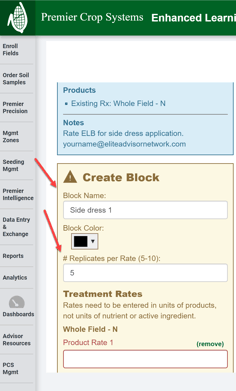
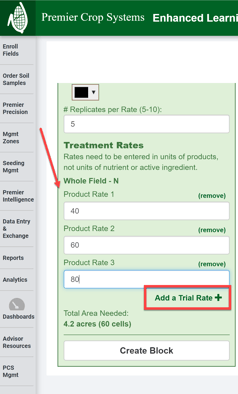
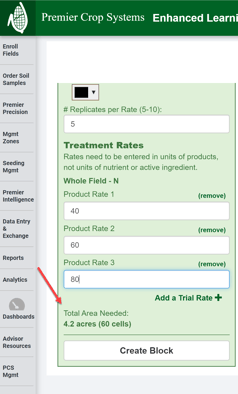
- Next, you will need to select your rates. If you need more than 3 rates, you can click the "Add Trial Rate+" button to add additional rates.
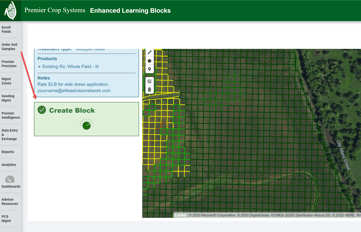
- You should see now the area that you will need to identify on the map that is suitable for your ELB placement.
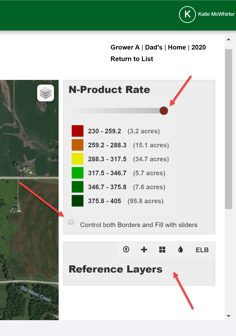
- If you need to use a Reference Lay or change the map's transparency or Control both Borders and Fill with sliders, you can do so on the right-hand side.
- In order to identify those cells, click the polygon on the map to begin to draw out that area.
- Start clicking in the map and click the last point to complete the polygon.
- Click the "Create Block" to finish the process.
- You will see that it is creating the block.
- If the area you selected was enough, you will see that you can Export and the Trial information.

- You can either export this out individually (you can do this as a batch function from the List page or you can can create another block.
- From the List page, you will have the option to Edit, Delete, or Export.
- If you need assistance, contact your advisor support reprentative.