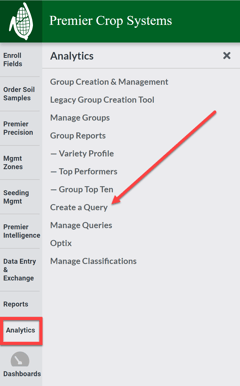
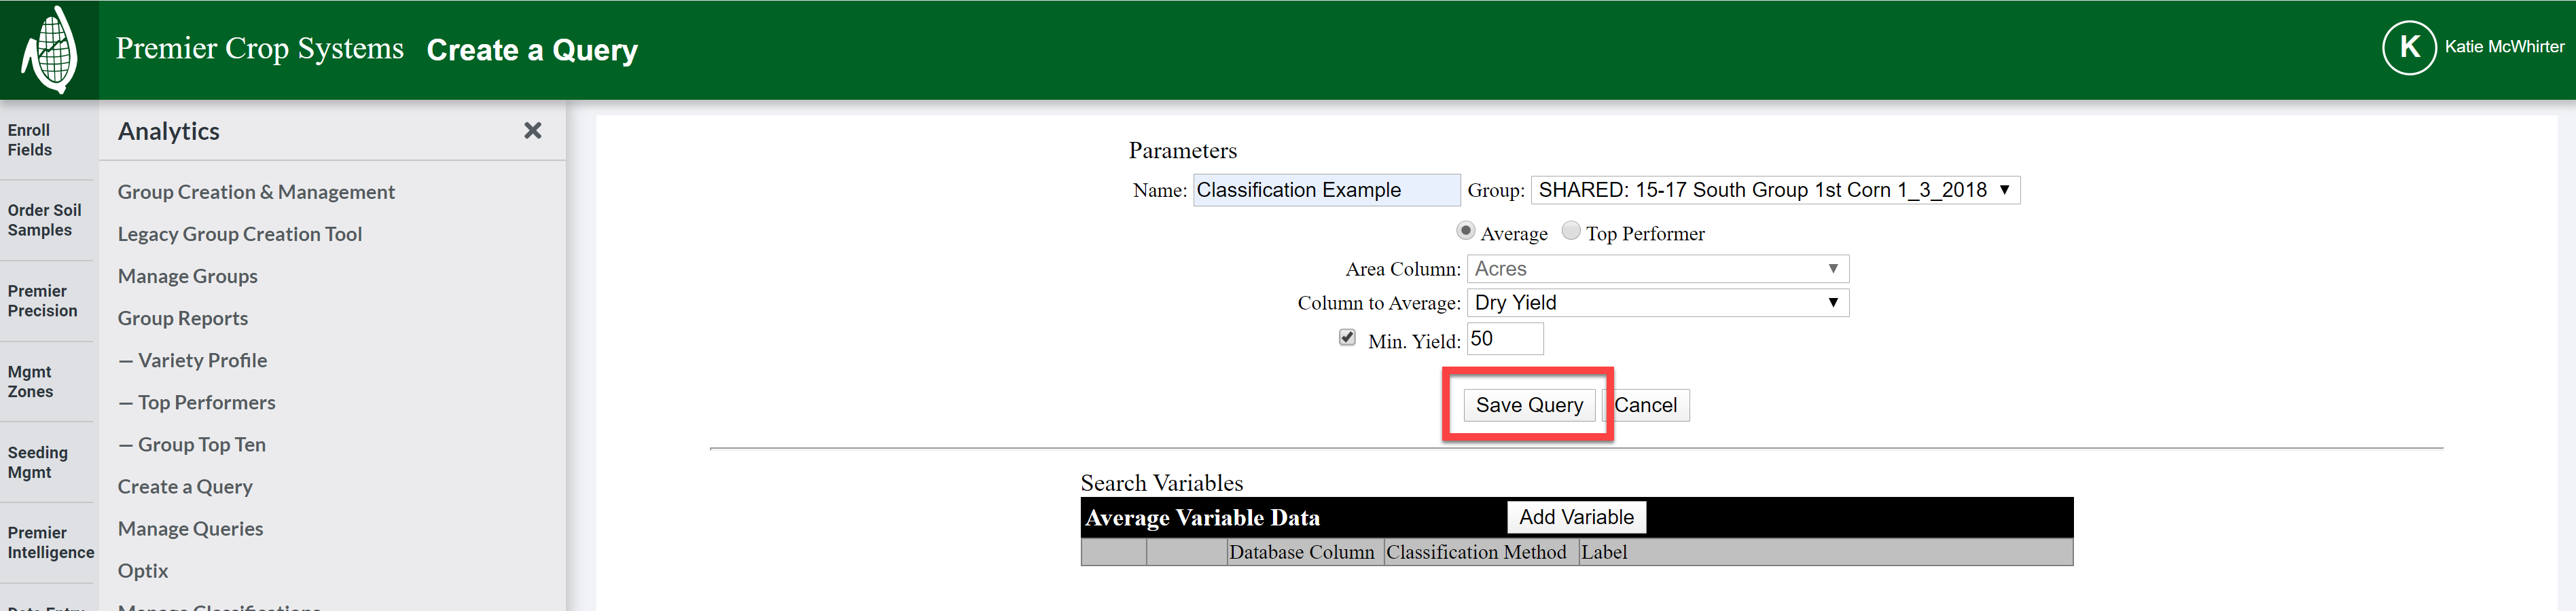
- Once logged into your PCS account, click on the the "Analytics” button and then select “Create a Query”.
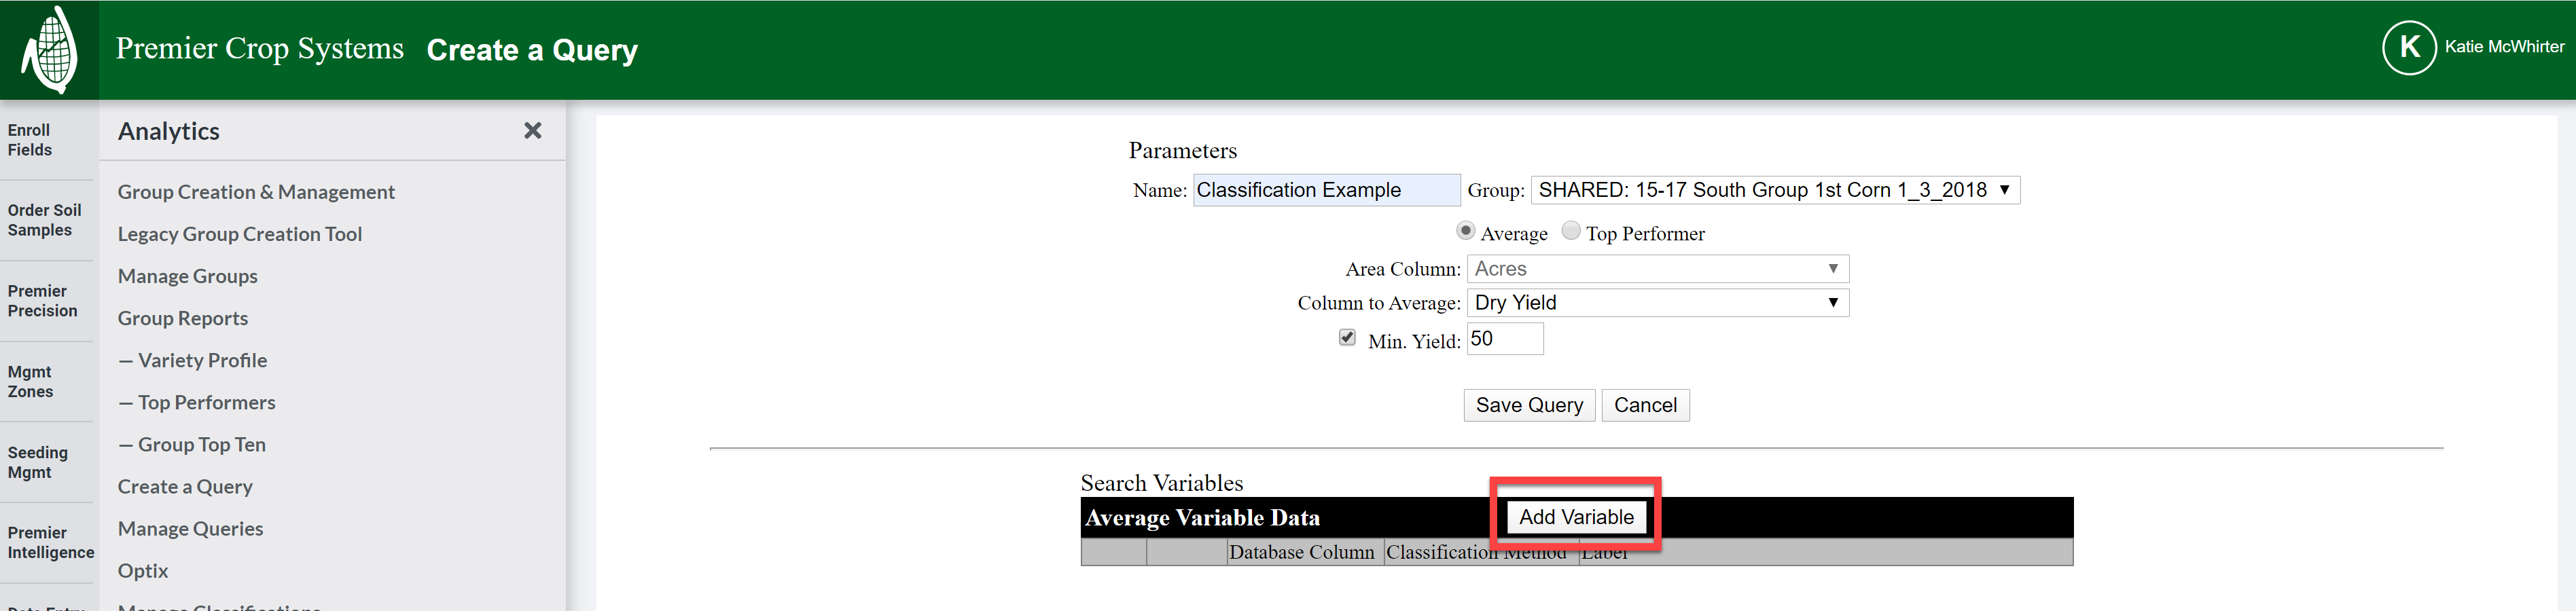
- Set your Parameters, by naming your query and selecting the group in which to run the query on,

- Change the “Column to Average” to whichever attribute you are wanting to average in the query.

- Set the minimum yield allowed into the query to remove outliers (drowned out spots, etc. that would skew the data from making a good query).

- Click the “Add Variable” button.
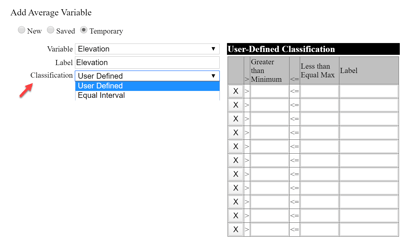
- You have three options for Adding Average Variable:
- Using a New User-Defined Classification (which will be saved in your list of classifications)
- Using a previously Saved one
- Using a Temporary (which will not be saved once you’ve created it). See Premier Process for Creating Classifications if you wish to save the user-defined classifiers that you have set up so that you can save these. If you need to edit, see the Premier Process for Updating Classifications.

- For New and Temporary, you will need to select the "Variable" that you wish to use by clicking the dropdown box.
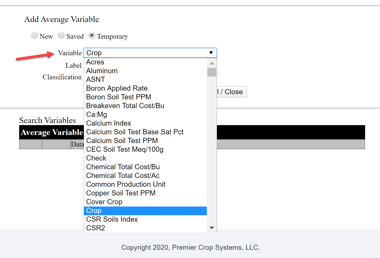
- If that Variable's classification has Unique Values, it means that those values are set in our system. Examples would be:
- Crop
- Product Name
- Soil Texture
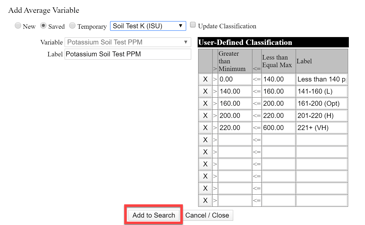
- If that Variable's classification are User-Defined, then you will need to select to define these yourself or use Equal Intervals. This is where saving these classifications becomes a big time saver, if you are wanting to run a query with the same User-Defined classifications many times, such as:
- Dates
- Soil Fertility Levels
- Applied Nutrient Rates
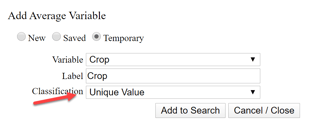
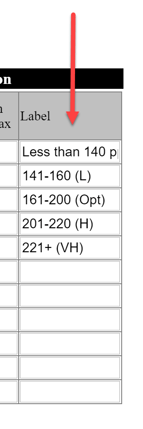
- Make sure that you label your ranges specifically, as that is what the resulting query will label these ranges.
- Once satisfied, click the "Add to Search" button.
- You will see that it has added to the “Search Variables” section at the bottom of the page. You may add up to 10 different variables.

- Once you have the variables added that you wish to use in your query, scroll to the top of the page and select “Save Query”.
- You will then get the notification that it is processing and you should click the “Continue” button.

- Finally, you will be directed to the “Manage Queries” page, where, once it processes (The “Status” will change from Pending, to Executing, to Unread as it goes through processing.), you may view the results by clicking the "Download EP Results".
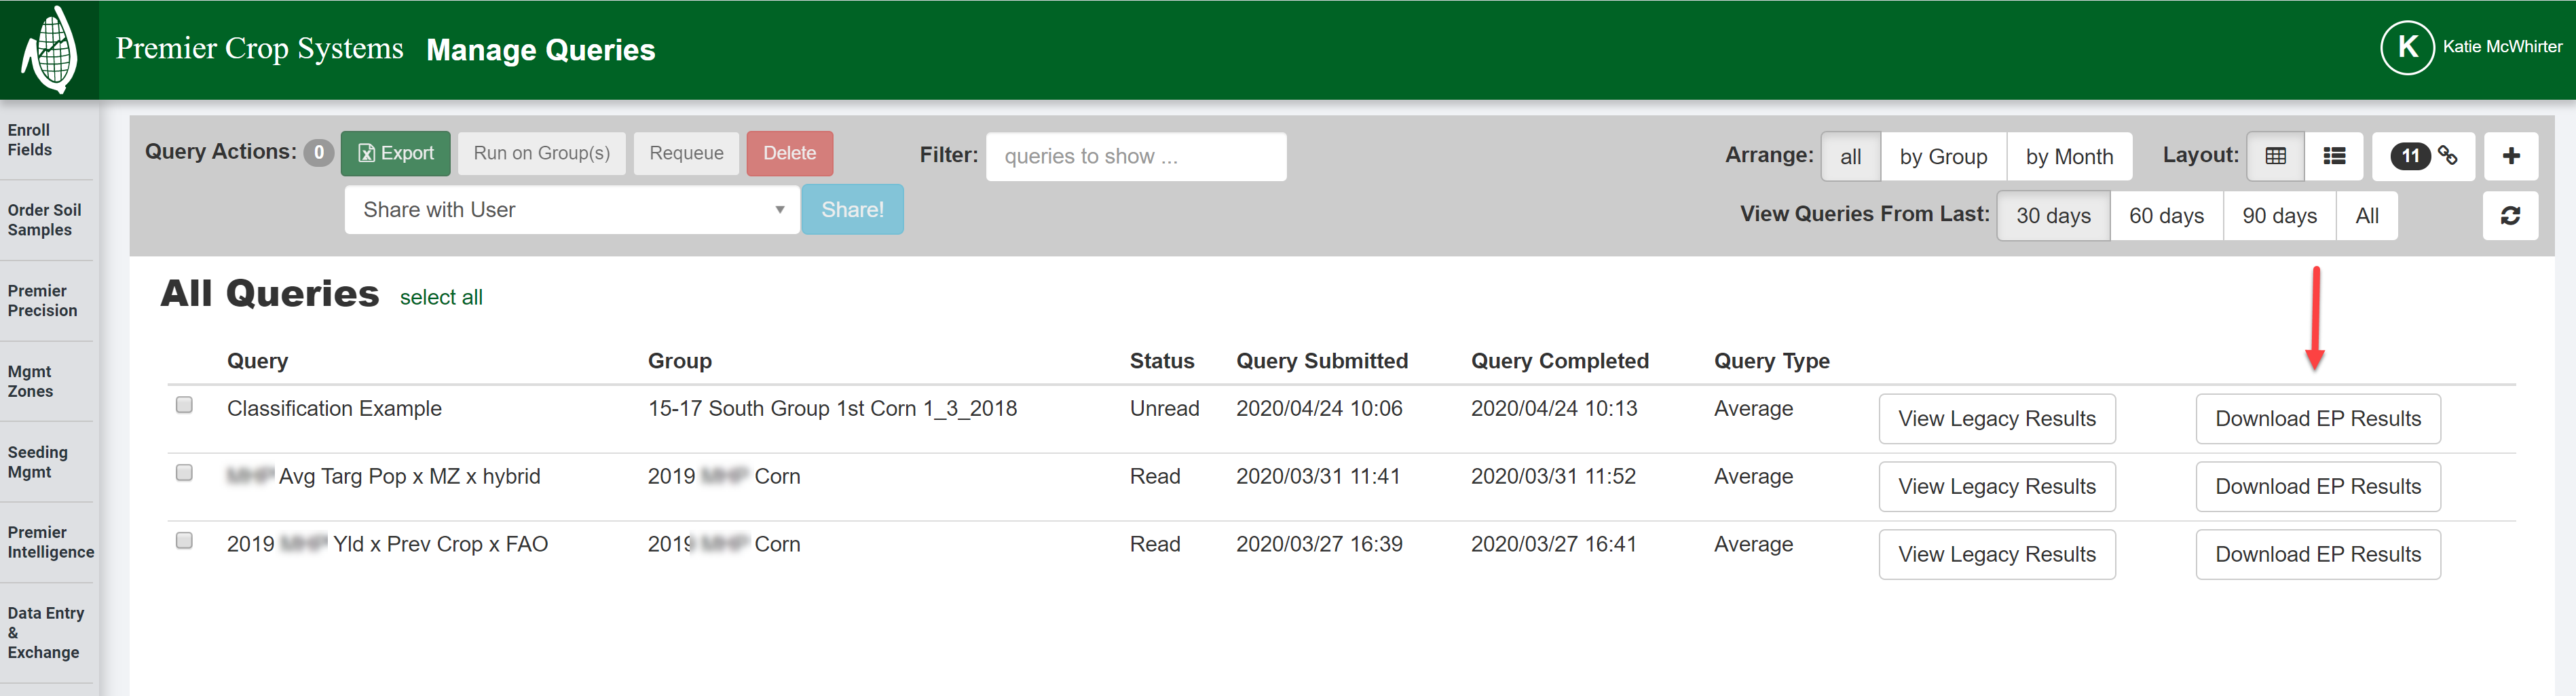
- This will export out your query into an Excel spreadsheet.
- If you have any questions, do not hesitate to ask your advisor support representative or your account manager.