Once logged into the PCS website, navigate to the Data Uploads page by clicking on Data Exchange > Data Upload.

By default, the Upload tab is exposed, but in case you need to, select it.

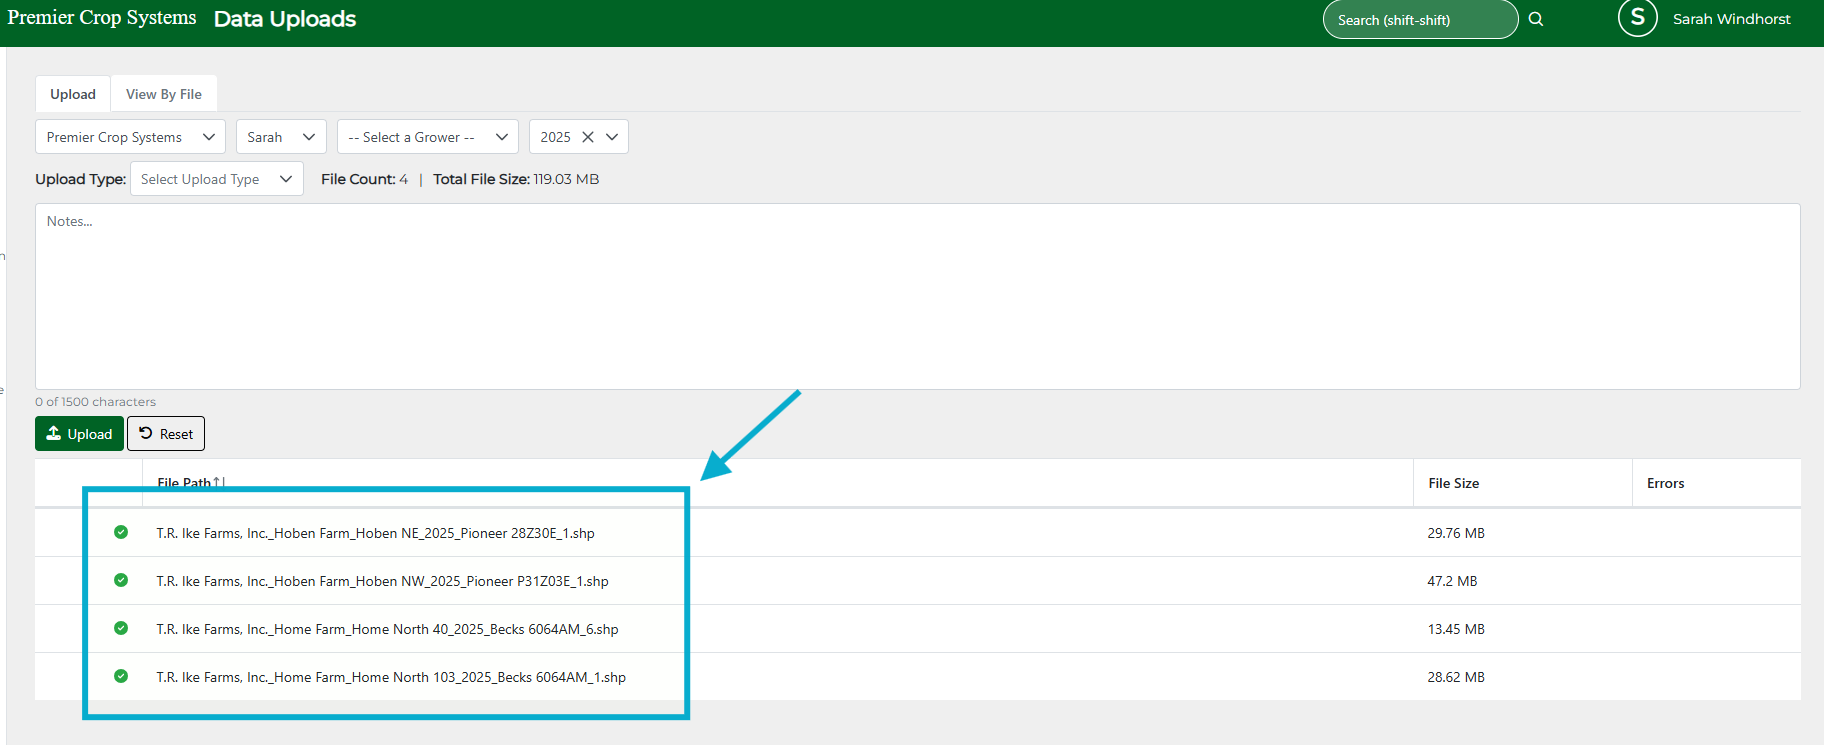
You can now select either a file or folder or Drag and Drop files.

Files can be open or zipped!
Once you've added files, you will see that they appear on the Upload tab.
Select your Upload Type from these options:
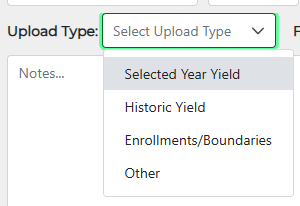
1. Selected Year Yield (use for loading yield into the year you've chosen in the hierarchy)
2. Historic Yield (use to bulk load past year's yield that should not go to the selected year)
3. Enrollments/Boundaries (use to load boundaries and enrollment sheets)
4. Other (everything else for fields already enrolled - planting, fertilizer, crop protection, soil samples etc.)
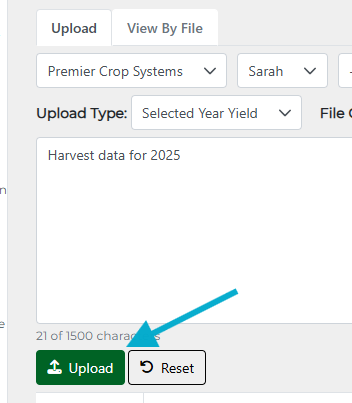
Next, type into the Notes box to let data support know any additional details. There is a 1500 character limit, which you can track using the character countdown.
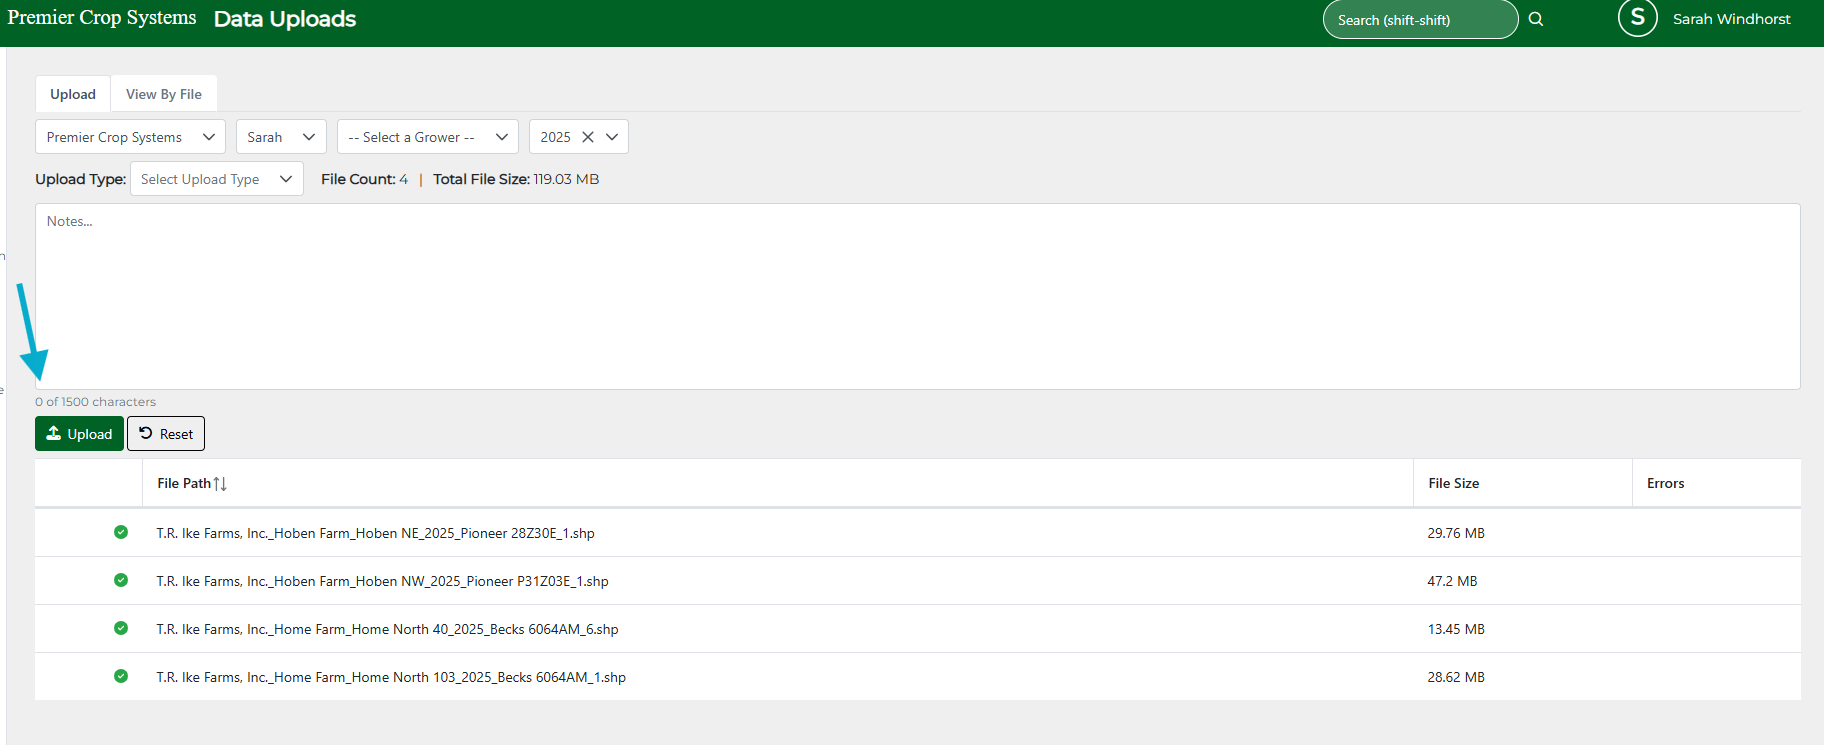
Click the "Upload" button.
You can see the status of file(s) on the right-hand side.

If this is Harvest Data for Selected Year Yield, it will auto-process and reports and removals will be available once they have processed through. You can use the Harvest Export Template for a .csv file from SMS, direct shapefile downloads from John Deere's Operation Center or upload shapefiles that contain the following information:
-
- ISO time stamp (Date/Time with minutes and seconds)
- Swath Width
- Distance
- Heading
- Section ID
For all other files, upload shapefiles (or .csv's for ELBs), as you have been, and choose the upload type accordingly. Email data.support@premiercrop.com with any questions.
If you have any questions, do not hesitate to contact your advisor support representative at data.support@premiercrop.com.